Here is one method I sometimes use when painting wood signs:
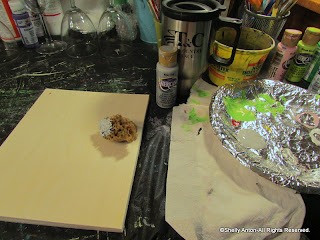
Step 1: I have four blank wood signs. Each is approx. 7" x 9". Hubby bought the wood and cut it to size. :) (Don't forget your coffee - see mine?)
Step 2: Choose any acrylic paint color and a sponge. I use Styrofoam plates as a palette. I cover it with foil to make the plates last longer. My sponge is wet, but not dripping wet. I chose gray paint.
Step 3: I
always use my old hair dryer. This definitely speeds up the process. It is also great for drying mid-way through projects to eliminate smearing!
Step 4: I do most of my work free hand, but I wanted to show you an easy way to do fancy font. I believe this font is Harrington. I make it the size I want, then print it out. I usually draw a box around the text to help center on the project.
Step 5: This is a graphite pencil I use to shade the back. Sometimes I use pink or white chalk instead - it depends on the project. A regular pencil will do as well.
Step 6: Turn the paper over, place it on the board, and trace with a mechanical pencil.
Step 7: I don't push super hard because I only use this for a guide and spacing. If you push harder or use more pencil rubbing on the back, it will be darker.
Step 8: I have a favorite liner brush. I am really hard on them, so I hope this one doesn't decide to "fan" out soon.
Step 9: Begin painting!
Step 10: I am left-handed, so I have to paint right to left. Believe it or not, I think I can paint cursive better right to left than left to right.
Step 11: All done with the words! I love this font - it seems to match this bible verse perfectly!
Step 12: Now for the fun dandelions! I water down my paint a smidge. These are just free hand. Every dandelion is different, so you really can't mess up.
Step 13: My dandelion paintings have been very popular.
Step 14: The black and gray dandelions are finished...now where to add the white one?
Step 15: Okay, I decided to add two white ones. :) All done!
Here are some more I painted today...
Have fun painting! If you are not a painter, you may click on the pictures to purchase one of these.
Thank you for visiting with me!
Click "LIKE" if you enjoyed this tutorial!
Click HERE or the cat to write a caption!


